In this article will learn how to create an environment in
App Service for application hosting. Suppose we have developed a website for a
business and setting up a new server, which may be challenging like you need
appropriate hardware, operating system, and web hosting stack. Once all things
are done, one headache comes maintenance, you will be facing this issue when
traffic on your site increases day by day, and now you will reinvest over
additional hardware and supporting software. Hosting your web application using
Azure App Service makes deploying and managing a web app much easier when
compared to maintaining a physical server. In this module, we will implement and
deploy a web app to App Service.
In this article, you
will learn:
1. Use the Azure portal to create an Azure App Service web app
2. Deploy your code to App Service using FTP
Prerequisites:
Please create an Azure account if you don’t have, please
follow the below link.
https://azure.microsoft.com/en-in/free/
Create a web app in the Azure portal
Please follow the below steps to create a web app, Step by step you will learn, how to create a web app for
Visual studio and will learn to deploy a web application using FTP.
1- Login to your Azure portal
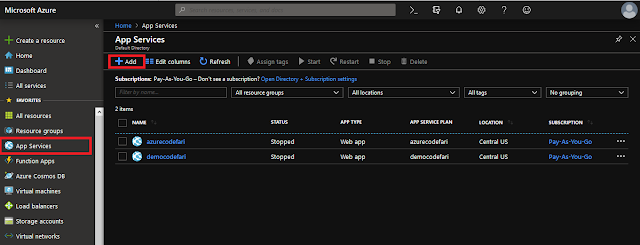
2- Click on All services ----- >
Filter/Search box with key App Services,
a new window will open like below.
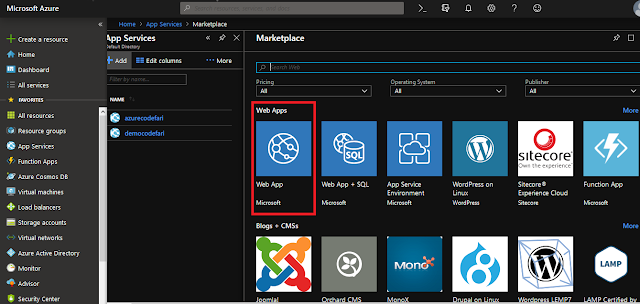
3- Click on the Add button, a window market place will open like below. Choose the
Web App and click on over it, now a side window will open where you find some
introduction below a create button.
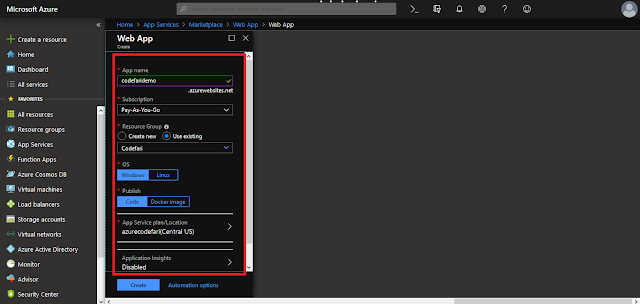
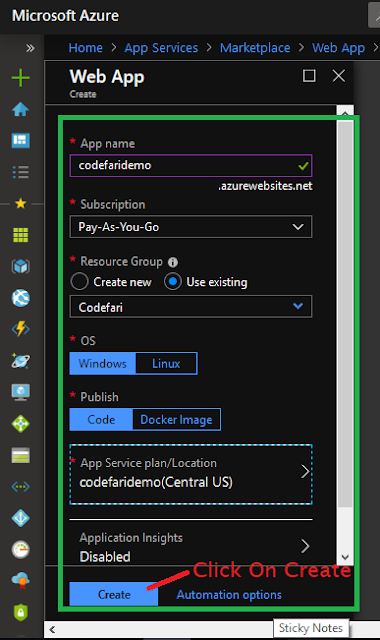
4- In the next step you will see the window
like below
Need to
understand available options in the above pic.
a)
App Name: Choose a name for your application
it should be unique, for example, I have taken “codefaridemo”.
b)
Subscription: Choose the subscription as per your
account SLA, if you are free to use, then choose a free subscription.
c)
Resource Group: Resource group is like a container
which contains services means every service belongs to a particular Resource Group, You have to create
Resource Group or chose existing one, in above pic you can see I have select
the existing RG.
d)
OS: Choose an operating system as per your requirement.
e)
Public: Chose as per your requirement I
suggest for the demo you should choose Code.
f)
App
Service Plane/ Location: In this option, you will set up the service plan and
location on which location you want to deploy.
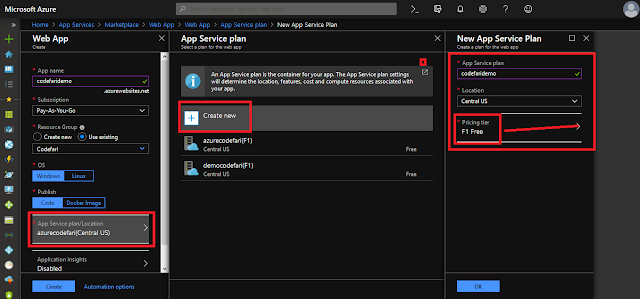
5- Now click on App Service Plan/Location, see below image.
App Service Plan/LocationàCreate Newàhere setup the required field “App Service Plan and Location”à App Service Plan and Pricing
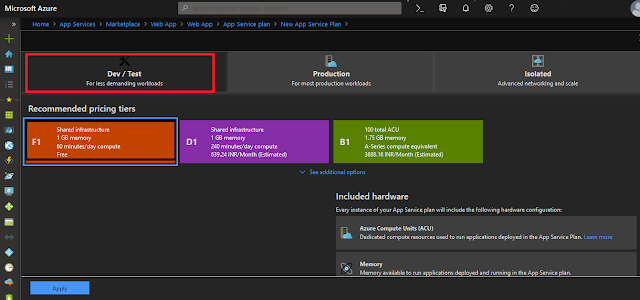
6- When click on pricing the following the window will open, you have a pay as you go
subscription and you are creating this Web App for learning purpose then choose
the following pricing model and
click on apply.
7- Now, you are ready to create a Web App.
Finally, click on the Create button. It
will take a few times to create.
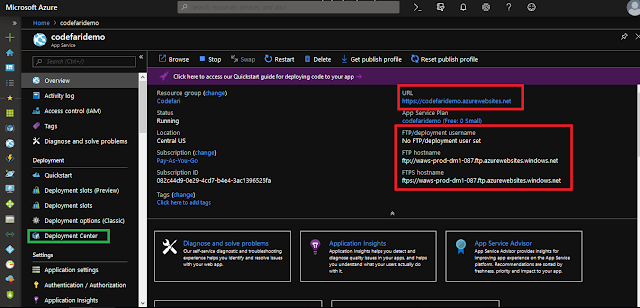
8- Once your Web App is ready, then go on the resource. It looks like below.
You can see
marked area,
URL: on this URL user will access your
application
FTP: FTP is not set, to set you FTP click
on deployment center (Marked in green).
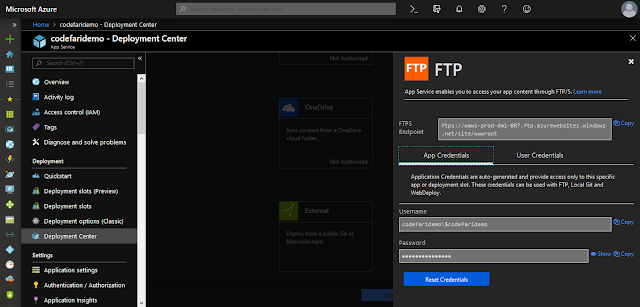
9- Now we will set up the FTP, when you click on Deployment Center you will found a lot
of option for deployment like Azure Repos, GitHub, BitBucket, LocalGit, Open
Drive, DropBox, External, and FTP. Please choose the option FTP other the deployment will learn latter.
Setup the FTP as you want and use this one to deploy the application.
For
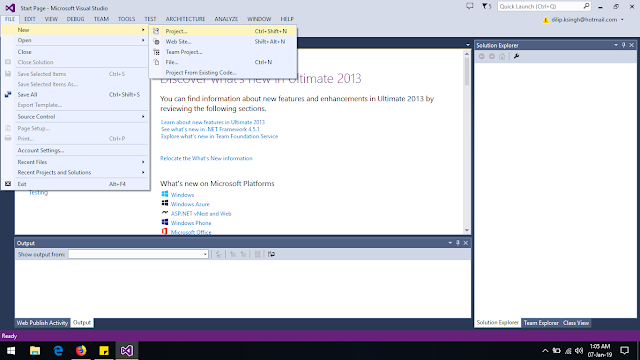
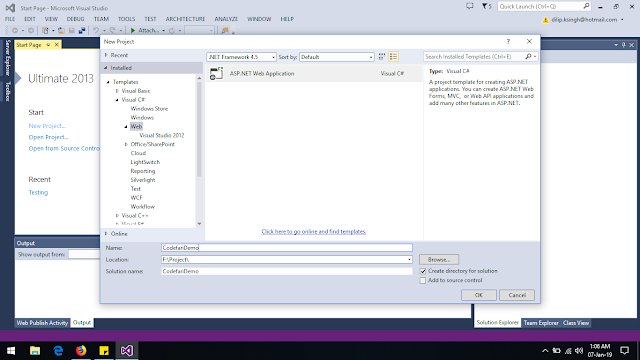
testing created a web application using visual studio
1- Open visual studio
1- Open visual studio
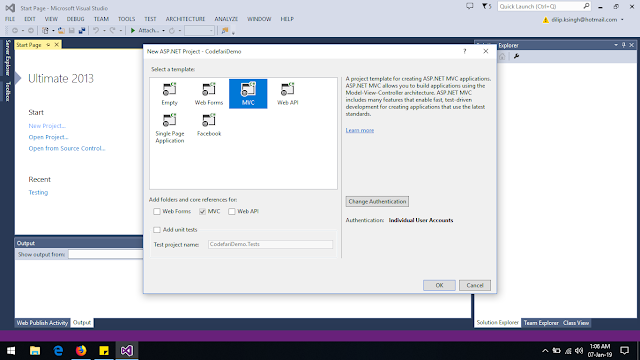
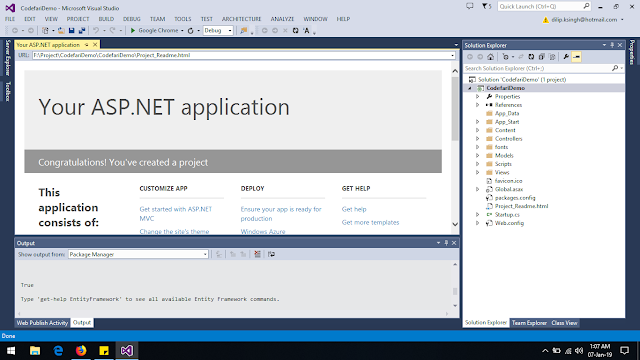
2- Create a web application with the existing template.
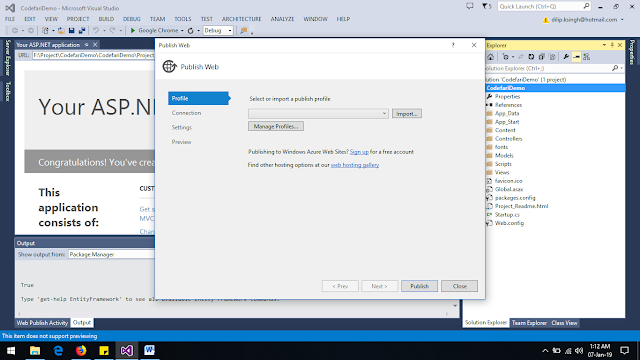
3- Now publish this application. Right
Click on the project and choose the option to Publish.
Publish as
file on a particular location.
4 - Now using File-Zila we will deploy
the web application on Azure Web App.
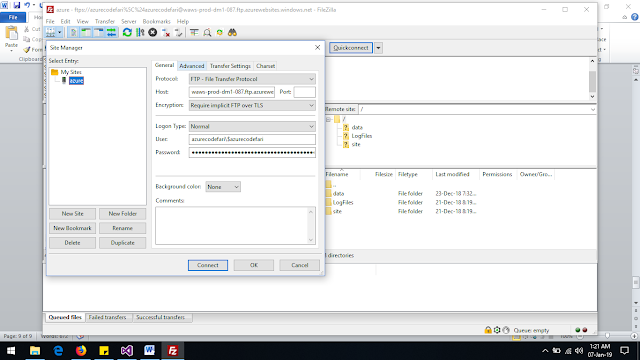
5- Login in File-Zilla using FTP
credentials.
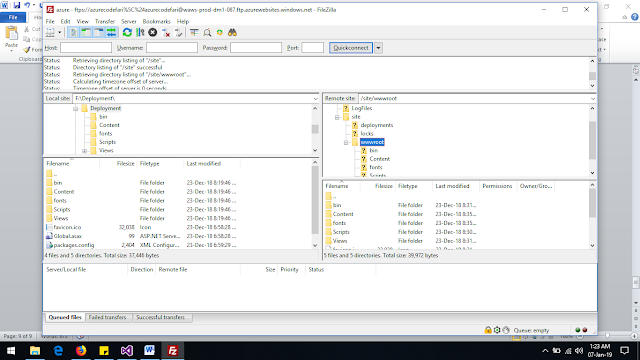
6- Transfer files on root location (wwwroot)
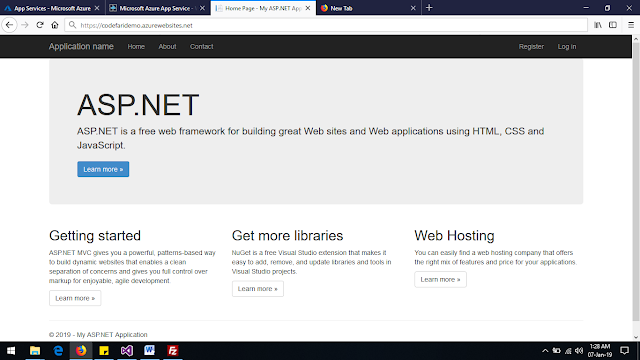
7- Now open Url: https://codefaridemo.azurewebsites.net/
Note:
Please give your feedback, and you can ask/share questions and issues. My team and I will respond to you. My mail id: dilip.ravi084@gmail.com
